
Grow Your Own Hydrangeas: A Guide to Propagation
Hydrangeas, with their breathtaking blooms, stand out as one of the most enchanting deciduous flowering bushes. If you’ve wandered through a nursery, you’ll note that these beauties often carry a hefty price tag, typically ranging between $25 and $50. This price point might nudge you to consider propagating your own plants through stem cuttings, allowing you to nurture a multitude of hydrangeas without emptying your wallet.
Remarkably, hydrangeas are ideally suited for propagation through cuttings. Unlike several other bushy plants, they exhibit rapid growth, blossoming into full-fledged flowering shrubs in just about a year.
Ideal Timing for Hydrangea Cuttings
While gardening enthusiasts have varied opinions on the perfect time for cuttings across different hydrangea varieties (like big-leaf, oak-leaf, smooth, and panicle), a common consensus is that spring stands out as the optimal time. This season witnesses a surge in the plant’s metabolic activity and growth, offering ample time for the cuttings to evolve into mature plants by fall.
It’s advisable to snip cuttings either early in the morning or during the evening to avoid the midday heat, which can stress the freshly cut stem.
Although some gardeners experiment with cuttings in the late summer or fall for indoor growth, this method generally poses more challenges and yields less success.
Understanding Hydrangea Varieties
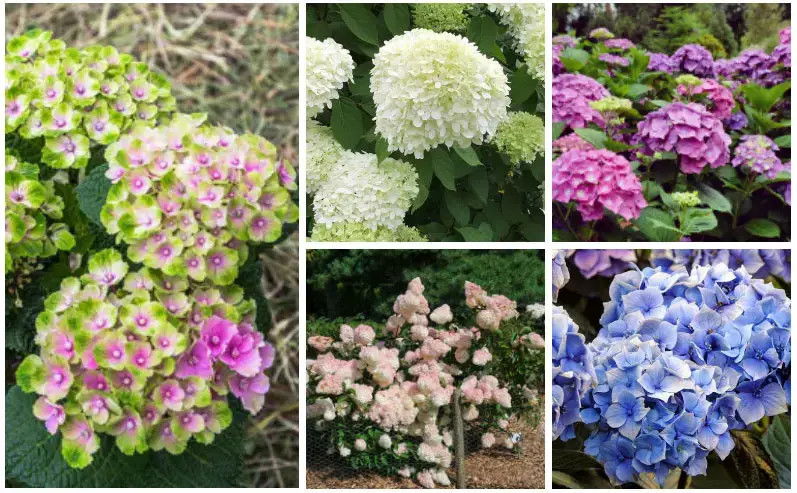
Hydrangea macrophylla (big leaf hydrangea):
This variety reaches a height of 6 to 10 feet, showcasing flowers ranging from blue to pink to white. Suitable for USDA zones 5 to 11, cuttings from this type are often successful both in early fall and spring.
Hydrangea arborescens (smooth hydrangea):
A moderate grower, this variety stands 3 to 5 feet tall with pristine white blooms. While it thrives in zones 3 to 9, propagation is often via root cuttings, though stems can also be used.
Hydrangea quercifolia (oakleaf hydrangea):
This type can grow up to 8 feet, adorned with white flowers. It flourishes in zones 5 to 9. For best results, snip cuttings from non-flowering stems in early spring and nurture them in pots until the roots are well-established.
Hydrangea paniculata (panicle hydrangea):
Towering between 8 to 15 feet, this variety exhibits flowers transitioning from white to pink. It’s best suited for zones 3 to 8, with spring being the prime time for cuttings.
Before diving into propagation, it’s beneficial to acquaint yourself with the distinct hydrangea types and their specific requirements. It’s essential to remember that each species boasts various cultivars, each exuding its own charm.
Essentials for Propagation Tools:
- Precise pruning shears
- Protective gardening gloves
Materials:
- Rubbing alcohol and cotton ball for sterilization
- Rooting powder
- A spacious 8-10 inch terra cotta pot
- Sterile soil meant for seed starting.
A Step-by-Step Guide to Growing Hydrangeas from Cuttings
1. Sterilize Your Shears
For a healthy start, make sure your pruning shears are clean. Dip a cotton ball in rubbing alcohol and thoroughly wipe the blades and handle. This step will safeguard your new plant against potential fungal diseases.
2. Snip a Healthy Green Branch
From a mature hydrangea, identify a vibrant green branch that hasn’t sprouted flower buds yet. Refrain from choosing older, rigid stems. The ideal length of the cutting is between 6 and 8 inches, and it should be taken roughly 2 inches beneath a leaf node.
3. Pare Down the Leaves
With your sterilized pruners, retain only the topmost two to four leaves and delicately remove the rest, ensuring the main stem remains untouched. Trim half of each of the upper leaves, using either the pruners or a pair of scissors.
4. Immerse in Rooting Hormone
Though optional, dipping the freshly cut end of the branch into a rooting hormone powder can significantly enhance the probability of rooting success.
5. Pot Preparation
Pick a pot based on the number of cuttings and your space constraints. Typically, an 8-10 inch terra-cotta pot should suffice.
Fill the chosen pot with a seed-starting potting mix. Once done, ensure the mix is moist but not waterlogged. Alternatives like vermiculite or coarse sand can also be used.
6. Set the Cutting in Place
Insert the cutting into the moistened mix, burying it up to where the remaining leaves begin. Ensure the mix is firm around the stems, then water adequately.
Encase the potted cuttings within a clear plastic bag, ensuring it’s not too tight. Place it in an area with bright indirect sunlight. Direct sun exposure can be detrimental, as it may overheat the cuttings, leading to rot.
Regularly check the potting mix’s moisture level, ensuring it remains moist but not overly wet.
7. Move to Larger Pots
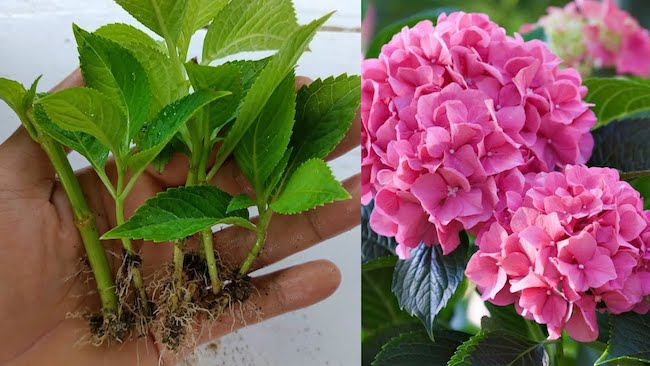
In about four weeks, you should notice roots sprouting from your hydrangea cuttings. As they develop further and showcase new green growth, it’s time to transfer them either to individual pots with regular potting soil or directly to your garden if they’re sufficiently grown.
Now, your new hydrangeas can be treated as mature plants, with a recommended watering routine of once a week.
8. Introducing Them to Your Garden
When relocating your new hydrangeas to your garden, ensure they have room to flourish. A spacing of 4 to 6 feet between each plant is ideal. If you plant them during the fall, expect blossoming shrubs in the following growth season.
Pro Tip
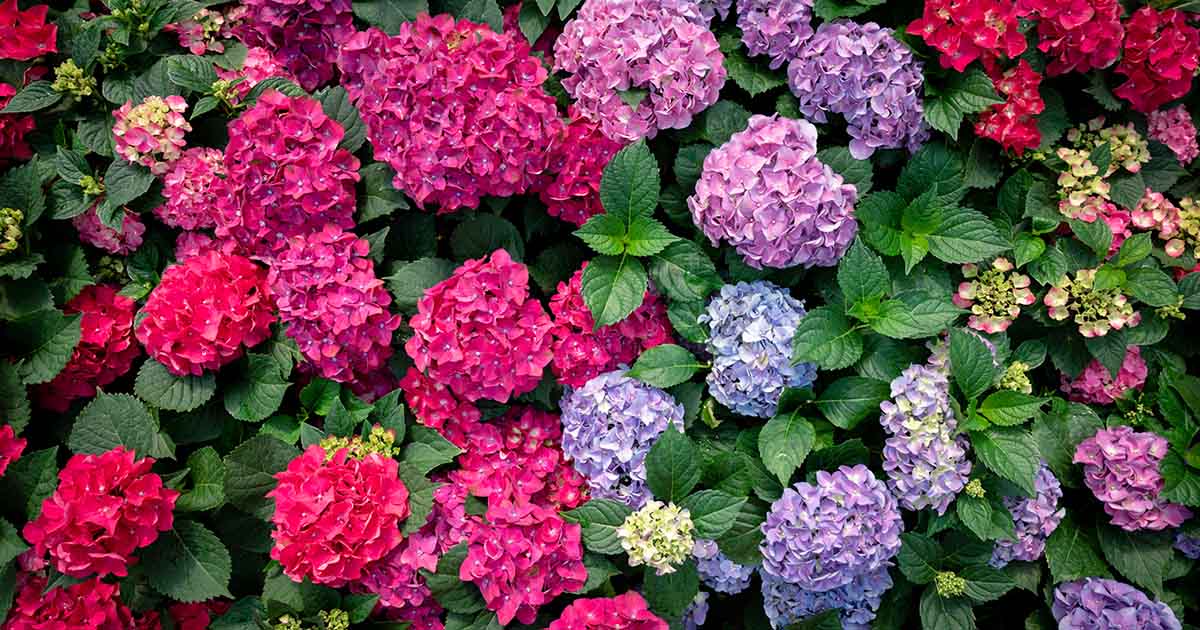
The magic of big leaf hydrangeas (Hydrangea macrophylla) is that you can influence their bloom colors! By adjusting the soil pH using specific soil enhancers, you can achieve blue flowers in acidic soils and pink blooms in alkaline ones.


